Recording your iPhone 14 screen is simple. Just swipe down to open the Control Center, and then tap the record button. A 3-second countdown will start, and then your screen will be recorded! To stop, tap the red status bar at the top, then tap Stop. Your video will be saved to the Photos app for viewing or editing.
After recording, the video goes straight to your Photos app. From there, you can view, edit, or share it as needed.
You can also check out this video for more information on recording your iPhone screen.
Introduction
Today, capturing what’s on your screen is an essential skill. Whether creating a tutorial, recording gameplay, or documenting a bug, screen recording on your iPhone 14 proves helpful. Apple has made this process straightforward, but knowing the details can improve your experience.
This feature is especially useful for students, gamers, tech enthusiasts, or anyone needing to share their screen activity. Plus, with the iPhone 14’s high-quality display, your recordings will look sharp and professional. Let’s explore how to utilize this feature, beginning with a detailed tutorial.
Step by Step Tutorial: How to do a Screen Recording on iPhone 14
Before starting the steps, let’s understand the goal. After following these instructions, you’ll be able to record anything on your iPhone 14’s screen, with or without audio.
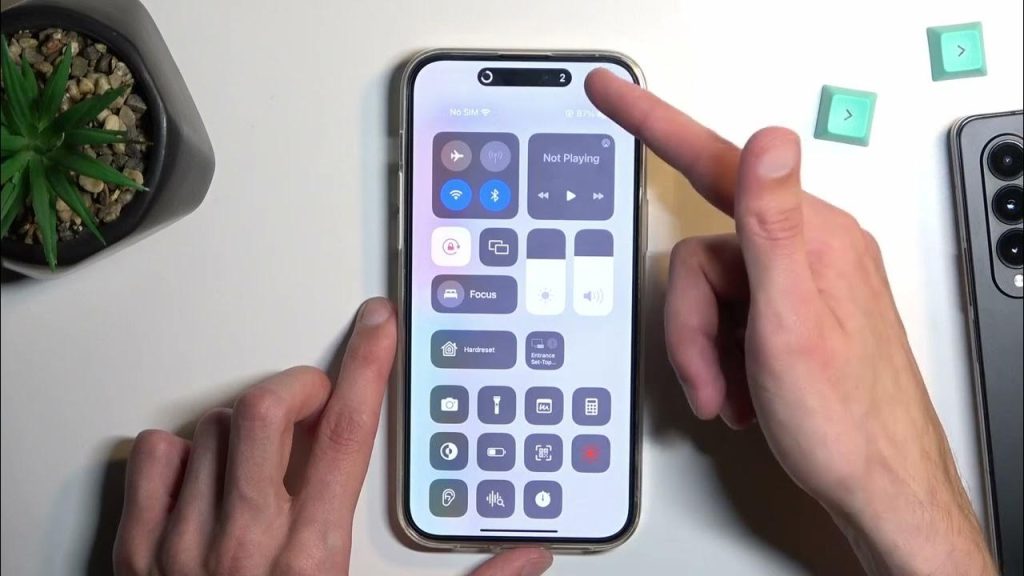
Step 1: Access the Control Center
Swipe down from the top-right corner to open the Control Center. This is your access point for many of the iPhone 14’s quick settings, including the screen recording feature. Make sure to start from the right corner; otherwise, you might open the Notification Center.
Step 2: Tap the Screen Recording Button
Find and tap the circular record button. If it’s not visible, you need to add it through the Settings app. Go to Settings > Control Center > Customize Controls, then tap the ‘+’ next to Screen Recording.
Step 3: Wait for the Countdown
Once you tap the button, a 3-second countdown begins, giving you time to navigate to the screen you want to record. Use this time to prepare your screen. To record audio from your microphone, press and hold the record button before tapping “Start Recording” to enable the microphone.
Step 4: Stop the Recording
To stop recording, tap the red status bar at the top of the screen, then tap Stop. The red status bar indicates that your screen is being recorded. Ensure you stop the recording this way to save the video correctly.
| Pros | Explanation |
|---|---|
| Ease of Use | Recording your screen on the iPhone 14 is very user-friendly and accessible from the Control Center. |
| No Additional Apps Needed | iOS allows you to record your screen without needing any third-party apps. |
| Edit and Share Immediately | The recording is saved to the Photos app, where you can edit and share your video immediately. |
| Cons | Explanation |
|---|---|
| Limited Editing Features | The Photos app offers basic editing features, and for more advanced editing, a separate app might be needed. |
| No Internal Audio Recording | iOS does not support recording the internal audio of your phone, only microphone audio. |
| Potential Privacy Concerns | Be careful of recording sensitive information, as everything on your display is captured. |
Additional Information
When recording your screen on the iPhone 14, consider the content being captured. It’s easy to overlook notifications that might pop up, so it’s wise to enable Do Not Disturb mode to keep your recording free from interruptions. Additionally, the iPhone does not record internal audio from the device, so sounds from videos or games won’t be captured.
Gamers wanting to record gameplay with game audio might find this a limitation. However, for most uses like creating a tutorial or demonstrating an app’s functionality, screen recording on the iPhone 14 is effective. Remember to manage your storage properly, as high-quality recordings can take up significant space, especially on a device with many apps and media.
Summary
- Open the Control Center by swiping down from the top-right corner.
- Tap the circular record button to begin recording.
- Wait for the 3-second countdown to end.
- To stop recording, tap the red status bar and then tap Stop.
Frequently Asked Questions
Can I record my screen with sound?
Yes, you can record with sound by turning on the microphone audio. Press and hold the record button before starting and tap the microphone icon.
How long can a screen recording be?
The recording length depends on your iPhone 14’s available storage. More space allows for longer recordings.
Does screen recording capture phone calls or FaceTime audio?
No, screen recording will not capture audio from phone calls or FaceTime for privacy reasons.
Can I edit my screen recording?
Yes, editing can be done in the Photos app, but the features are basic.
Where do my screen recordings get saved?
Screen recordings are saved to the Photos app, where they can be viewed, edited, and shared.
Your Recording Journey Begins Here
Screen recording on the iPhone 14 offers great potential. Whether you’re creating tutorials, making quick demos, or preserving memories, mastering this function can make a significant difference.
Mind your device’s storage and privacy to maximize the benefits of this tool. Happy recording!